雙端佇列 Deque
雙端佇列(double-ended queue,通常縮寫為 deque)是一般化(generalize)的佇列或堆疊。比起佇列只能「先進先出 FIFO」,以及堆疊只有「後進先出 LIFO」,雙端佇列可以從最前端或最末端任意方向,在常數時間複雜度內增刪元素,更為方便。
雙端佇列常見用動態陣列或是鏈結串列實作,動態陣列的實作會因空間不夠,需要重新配置記憶體,但通常會支援隨機存取(random access);鏈結串列的實作版本雖無法隨機存取,相對地增刪元素不需記憶體重配置。
雙端佇列顯著的缺點是:無論以動態陣列或連結串列實作,基本款實作通常無法在 $O(k)$ 時間複雜度的情況下,選定範圍內 k 個元素並取得單一切片(slice)。這肇因於動態陣列的實作通常內部儲存空間經過多次增刪,空間利用會不連續;而用鏈結串列實作者,則因不支援隨機存取而無法達到相應的複雜度。
本次實作的程式碼置於在
rust_algorithm_club::collections::DequeAPI 文件中。
架構設計
雙端佇列有個實作重點:可在常數時間從頭尾兩端增刪元素。在資料結構設計上,會儲存分別指向頭尾的兩個指標,長相可能如下:
#![allow(unused)]
fn main() {
struct Deque {
    head: usize,
    tail: usize,
    storage: SomeStorageType,
}
}
第一直覺肯定是選用雙向鏈結串列可以雙向增刪節點的特性,作為解決方案。不過這裡我們採用動態陣列實作,更精確來說,底層儲存容器同樣是有兩個分別指向頭尾的指標的「環形緩衝區(Ring buffer)」。
環形緩衝區
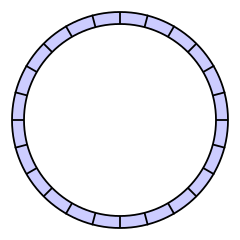
環形緩衝區(Ring buffer) 是一個長度大小固定的緩衝區,可以視為頭尾相連的記憶體區塊,上圖雖以環狀呈現,但在計算機架構中儲存方式通常是線性陣列,再搭配指向頭端的 head 與指向尾端的 tail 兩個指標構成。
環形緩衝區有分兩種,一種是有循環的,緩衝區寫滿了就覆蓋尾端舊的資料,另一種是不會循環,緩衝區會放滿的,後者就是本次實作會用到的,以下將來探討:
- 如何表示環形緩衝區為空
- 如何表示環形緩衝區已滿
- 環形緩衝區如何增加元素
這節以 ASCII chart 表示之。
h: headt: tailx: no data[number]: has data
下面一個容量為 8,尚未有任何元素存入的環形緩衝區,這裡觀察到,若 head 與 tail 指向的儲存單元相同,換句話說兩者索引值相同,則緩衝區為空。
scenario: empty buffer

h
t
---------------
x x x x x x x x
---------------
再來,從頭端增加一個元素,此時 head 指向的儲存單元會存入元素,並且 head 索引加一。
scenario: add one data onto head

t h
---------------
1 x x x x x x x
---------------
我們再連續加幾個元素,可以觀察到,head 最終指向的儲存單元永遠為空:
scenario: add more data onto head

t   h
---------------
1 2 x x x x x x
---------------

t     h
---------------
1 2 3 x x x x x
---------------

t       h
---------------
1 2 3 4 x x x x
---------------
再來,我們從尾端增加元素,首先 tail 減一,並在移動過後的 tail 指向的儲存單元放入元素。因為 tail 原本為 0,減一之後為 -1,但索引不該有 -1,所以我們採取類似環繞算術運算(wrapping arithmetic operation)處理整數溢位,因此 tail 索引從 0 變成 7(總共 8 個儲存單元)。
scenario: add data onto tail

        h     t
---------------
1 2 3 4 x x x 5
---------------
日常生活中,環繞算術運算可見於汽車儀錶板或是電錶,9999 轉過頭後會自動變成 0000,可以想像成在萬分位進位了,但我們看不到。上述減一也可以想像二進位退一位,但我們看不到,所以從
0b000(0)變成了0b111(7)。
我們從尾端加更多資料到緩衝區:
scenario: add more data onto tail

        h   t
---------------
1 2 3 4 x x 6 5
---------------

        h t
---------------
1 2 3 4 x 7 6 5 --> full
---------------
欸,怎麼加到第七個就停了?
由於目前僅探討不循環的環形緩衝區,已經規範 head = tail 代表緩衝區為空,如果貿然加上第八個元素,就無法分辨緩衝區是空是滿,恐導致轉盈為空。所以當緩衝區容量減去元素個數為 1 時,換句話說就是當剩餘最後一個空儲存單元時,表示該緩衝區已滿,不能再增加元素。由此推論環形緩衝區永遠會剩下一個沒使用的儲存單元。
至此,環形緩衝區的特性很符合雙端佇列的需求,總結一下:
head = tail時,表示緩衝區為空。- 容量僅剩一個儲存單元時,表示緩衝區已滿。
- head 永遠指向一個空的儲存單元。
- 邏輯索引的映射會利用環繞算術運算配合模除運算,將索引值限制在緩衝區範圍內。
第四點很難懂齁?免驚,下面實作範例「邏輯索引映射」段落就會解釋給你聽!
手動配置記憶體
這一段,我們將為環形緩衝區打造屬於它自己的底層儲存空間。你可能想問,既然環形緩衝區是一個固定長度的陣列,為什麼不直接利用 Rust 標準函式庫的 Vec 呢?因為 Vec 的容量和記憶體配置屬於實作細節,雖然目前是滿了才擴充容量重新配置空間,但難保未來改變,為了更細緻控制記憶體,決定弄髒手,自行配置記憶體。
⚠️ 以下範例有
unsafe程式碼,未經審計,請謹慎使用。
首先,宣告一個 RawVec 結構體,儲存了兩個欄位:
#![allow(unused)]
fn main() {
struct RawVec<T> {
    ptr: *mut T,
    cap: usize,
}
}
接下來,我們要為 RawVec 實作三個方法,完成自我管理記憶體的偉大志向:
with_capacity:建立指定容量的RawVec,會在堆疊上配置一塊記憶體。try_grow:嘗試將RawVec的容量加倍,會觸發記憶體的重新配置。drop:實作Drop特徵,會釋放在堆疊上手動配置的記憶體。
先來看 with_capacity:
#![allow(unused)]
fn main() {
impl<T> RawVec<T> {
    // ...
    pub fn with_capacity(cap: usize) -> Self {
        let layout = Layout::array::<T>(cap).unwrap(); // 1

        // 2
        if layout.size() == 0 {
            // This is safe for zero sized types. However, be careful when facing
            // zero capacity layouts. It must be replaced with an actual pointer
            // before operations such as dereference or read/write.
            let ptr = ptr::NonNull::dangling().as_ptr(); // 3
            Self { ptr, cap: 0 }
        } else {
            // This is safe because it conforms to the [safety contracts][1].
            //
            // [1]: https://doc.rust-lang.org/1.49.0/alloc/alloc/trait.GlobalAlloc.html#safety-1
            let ptr = unsafe { alloc(layout) }; // 4
            if ptr.is_null() {
                handle_alloc_error(layout);
            }
            Self {
                ptr: ptr.cast(),
                cap,
            }
        }
    }
}
}
- 首先,我們先透過
Layout::array取得給定長度給定型別的陣列的記憶體佈局,這個佈局包含記憶體對齊(二的倍數的位元組)與佔用記憶體大小等資訊。 - 再來這個
layout.size()條件式是因為alloc為unsafe函式,需遵守其安全條款:不允許配置大小為零的空間。因此,必須判斷實際上需要配置記憶體與否,有兩種情況不需配置:T是 Zero Sized Types(ZSTs),也就是不需要空間的型別。cap為零,所以不需要容量。
- 若記憶體佈局所佔空間大小為零,則配置一個
NonNull的迷途指標。- 對 ZST 來說,
NonNull是安全的,ZST 的指標算術操作無論如何加減,都會指向原始的指標位址,所以上層可以零成本的抽象操作容器的各種方法,完全不需要配置額外記憶體區塊。 - 對非 ZST 但容量為零的記憶體佈局來說,
NonNull不會有危害但要非常小心,只有在容量大於 0 且內容有初始化時,才該允許指標算術,否則可能存取到未初始化的記憶體位址,進而引發未定義行為。
- 對 ZST 來說,
- 很簡單地呼叫
alloc讓 Rust 全域預設的配置器幹一塊空間資源來。因為alloc發生記憶體配置錯誤時會回傳空指標,所以這裡按照官方建議用handle_alloc_error捕捉這個行為,防止空指標被當作合法指標使用。
Rust 1.28 導入 Global allocators 的功能,讓使用者使用
#[global_allocator]屬性,替標準函式庫註冊全域的記憶體配置器,也因此,上述的alloc、realloc、dealloc即將在 allocator_api 穩定後被取代。
看完配置記憶體,來看如何手動釋放記憶體。Rust 的 Drop 特徵有 drop() 方法,會在數值不需要時呼叫,類似其他語言的解構函式(destructor)。我們將釋放記憶體的邏輯放在 RawVec::drop 裡面,當 RawVec 不被需要時,就會協助我們釋放手動配置的記憶體。
#![allow(unused)]
fn main() {
impl<T> Drop for RawVec<T> {
    /// Deallocates the underlying memory region by calculating the type layout
    /// and number of elements.
    ///
    /// This only drop the memory block allocated by `RawVec` itself but not
    /// dropping the contents. Callers need to drop the contents by themselves.
    fn drop(&mut self) {
        let layout = Layout::array::<T>(self.cap).unwrap(); // 1
        if layout.size() > 0 {
            // This is safe because it conforms to the [safety contracts][1].
            //
            // [1]: https://doc.rust-lang.org/1.49.0/alloc/alloc/trait.GlobalAlloc.html#safety-2
            unsafe { dealloc(self.ptr.cast(), layout) }
        }
    }
}
}
實作上,第一步取得當前記憶體佈局,並透過 dealloc 配合指標來釋放記憶體。當然,ZST 或是容量為零的狀況並沒有配置記憶體,額外判斷無需釋放。
最後,來瞧瞧 try_grow,為了簡化實作,每次呼叫時,記憶體區塊就單純加倍。
#![allow(unused)]
fn main() {
impl<T> RawVec<T> {
    // ...
    pub fn try_grow(&mut self) {
        if mem::size_of::<T>() == 0 {
            return; // 1
        }

        if self.cap == 0 {
            *self = Self::with_capacity(1); // 2
            return;
        }

        let old_layout = Layout::array::<T>(self.cap).unwrap(); // 3
        let new_cap = self.cap << 1;
        let new_size = old_layout.size() * new_cap;
        // This is safe because it conforms to the [safety contracts][1].
        //
        // [1]: https://doc.rust-lang.org/1.49.0/alloc/alloc/trait.GlobalAlloc.html#safety-4
        let ptr = unsafe { realloc(self.ptr.cast(), old_layout, new_size) };
        if ptr.is_null() {
            handle_alloc_error(old_layout);
        }
        // ...Old allocation is unusable and may be released from here at anytime.

        self.ptr = ptr.cast(); // 4
        self.cap = new_cap;
    }
}
}
- ZST 的空間不需加倍,直接返回。
- 原本空間容量為零的狀況,直接配置容量為一的空間。
- 準備
realloc需要的參數:容量超過零的,取得舊的記憶體佈局,並乘上翻倍後的容量,算出新的空間大小。這讓之後呼叫realloc時符合其安全條款:合法指標、空間大於零、記憶體佈局為該區塊的舊佈局。 - 呼叫
realloc之後,原先記憶體區塊可能被釋放,因此不該繼續用舊指標,此以新指標取代之。
終於將手動配置記憶體的邏輯封裝在 RawVec 裡面,外部不需要弄髒手搞記憶體了!
Deque
有了 RawVec,現在可以將先前缺失的 SomeStorageType 補上,初始化的方法也異常單純。
#![allow(unused)]
fn main() {
pub struct Deque<T> {
    tail: usize,
    head: usize,
    ring_buf: RawVec<T>,
}

impl<T> Deque<T> {
    pub fn new() -> Self {
        Self {
            tail: 0,
            head: 0,
            ring_buf: RawVec::with_capacity(DEFAULT_CAPACITY),
        }
    }
}
}
至此,Deque 結構體的佈局設計告一段落,接下來就是各種方法實作。
基本操作
身為一個雙端佇列,會有以下符合定義的基本操作:
new:初始化一個容器。push_front:在容器最前端新增一個元素。push_back:在容器最末端新增一個元素。pop_front:移除在容器最前端的元素。pop_back:移除在容器最末端的元素。
另外為了提升方便性,也提供了一些方法:
front:查看容器最前端的元素。back:查看容器最末端的元素。len:檢查容器內的元素數目。is_empty:檢查容器內是否沒有任何元素。iter、iter_mut、into_iter:產生一個疊代容器內所有元素的疊代器。
因為需要比較動態精細地控制記憶體,少不了一些內部方法:
is_full:檢查底層環形緩衝區是否滿載。try_grow:嘗試動態增加底層儲存空間。wrapping_add、wrapping_sub:確保邏輯索引的增減正確映射到底層實際索引位址。
邏輯索引映射
前一段提及環形緩衝區可以從頭尾增加元素,這一段來說明「如何封裝環形緩衝區內部的物理索引」,讓外部的邏輯索引可映射到內部已儲存合法數值的緩衝區位址。
再回來看容量為 8 的雙端佇列的例子,已進行一系列操作:
- push_back 1
- push_back 2
- push_back 3
- push_back 4
- push_front 5
- push_front 6
        h   t
---------------
1 2 3 4 x x 6 5
---------------
如果我們要按照順序,從佇列的 tail 到 head 印出所有元素,應該從 tail 開始,逐一增加索引,依序 6 5 1 2 3 4 印出,我們畫上虛擬的元素對應位置:
~: virtual element

        h   t -->
-----------------------
1 2 3 4 x x 6 5 1 2 3 4
-----------------------
                ~ ~ ~ ~
顯而易見,虛擬元素對應的索引是 8、9、10、11,已經超過緩衝區的長度,可以利用模除運算計算物理索引,將索引固定在一定長度內。目前緩衝區容量為 8,所以將索引全部 模除 8:
8 % 8 = 0:對應到 [0] 的元素 19 % 8 = 1:對應到 [1] 的元素 210 % 8 = 2:對應到 [2] 的元素 311 % 8 = 3:對應到 [3] 的元素 4
模除是直觀的作法,但還有更神奇的思路:位元運算(bitwise arithmetic)。只要拿 7 跟這些索引做 & 位元 AND 運算,也能得到相同結果。
       8        9       10       11 <- Logical

  0b1000   0b1001   0b1010   0b1011
& 0b0111   0b0111   0b0111   0b0111
-----------------------------------
  0b0000   0b0001   0b0010   0b0011
=      0        1        2        3 <- Actual
這邊使用 7 有其意義:
- 7 是 $2^3 - 1$,剛好 $2^n - 1$ 在是二進位制中全部位元都會是 1 ,任意數與 $2^n - 1$ 做位元 AND 運算,可以得到低位 n 位中有多少 1,同時捨棄大於 n 的位元。這個特性不偏不倚和模除的結果相同。
- 還記得環形緩衝區有個特性嗎:容量僅剩一個儲存單元時,表示緩衝區已滿。若能保證環形緩衝區的容量必為 $2^n$,當緩衝區滿時,元素個數定為 $2^n - 1$,完全符合前一點的特性。
綜合以上,只需要保證緩衝區容量是 $2^n$,將邏輯索引映射到實際索引,只要將索引和實際可用容量($2^n - 1$)做位元 AND 運算即可:
#![allow(unused)]
fn main() {
fn wrap_index(index: usize, size: usize) -> usize {
    debug_assert!(size.is_power_of_two());
    index & (size - 1)
}
}
接下來,就可以推出 wrapping_add 和 wrapping_sub 這兩支正確增減索引的方法:
#![allow(unused)]
fn main() {
impl<T> Deque<T> {
    // ...
    fn wrapping_add(&self, index: usize, addend: usize) -> usize {
        wrap_index(index.wrapping_add(addend), self.cap())
    }

    fn wrapping_sub(&self, index: usize, subtrahend: usize) -> usize {
        wrap_index(index.wrapping_sub(subtrahend), self.cap())
    }

    fn cap(&self) -> usize {
        self.ring_buf.cap()
    }
}
}
上面用環繞算術運算(wrapping arithmetic operation) 可以使開發更方便,例如遇上 index 0 而 subtrahend 1 時,巧妙避開 $0 - 1 = -1$ 但
usize不能為負的限制,直接環繞回usize::MAX。
值得一提的是,在 Deque::cap 這個簡單的封裝上呼叫了 RawVec::cap,這是新增的方法,旨在提供 ZST 一個很大很大的虛擬容量,但同時保證是 2 的次方:
#![allow(unused)]
fn main() {
impl<T> RawVec<T> {
    // ...
    pub fn cap(&self) -> usize {
        if mem::size_of::<T>() == 0 {
            1usize << (mem::size_of::<usize>() * 8 - 1)
        } else {
            self.cap
        }
    }
}
}
動態增加記憶體空間
前面提及環形緩衝區是長度固定的陣列,但雙端佇列若必須固定長度就太沒路用,直觀作法就是透過加倍 RawVec 容量,再繼續新增元素。這個想法沒錯,但會遇到一個問題:如何確保邏輯索引在記憶體加倍後依然正確映射到實際索引?這裡舉一個實際案例:
Before:
         h   t
[o o o o x x o o]

Resize:
         h   t
[o o o o x x o o | x x x x x x x x]
同樣一個容量為 8 的佇列,觸發了記憶體重新配置,所以記憶體加倍,無奈今非昔比,現在的邏輯索引 tail 無法映射到實際索引,環形緩衝區的「環」已經斷掉。若我們繼續 push_back 往 head 添加元素,就會覆蓋掉 tail 和後面的元素。
after 4 push_back:

overwritten: ⌀
newly added: _

             t h
[o o o o o o ⌀ ⌀ | x x x x x x x x]
         _ _ _ _
有鑑於此,需要修正將斷掉的環,最簡單的作法就是將緩衝區首個索引到 head 之前的索引這段記憶體空間,複製到新翻倍的空間上,讓 tail 在 head 前面,合法的記憶體區塊再次變得連續:
Before:
         h   t
[o o o o x x o o]

Resize:
         h   t
[o o o o x x o o | x x x x x x x x]

Copy:
             t           h
[x x x x x x o o | o o o o x x x x]
 _ _ _ _           _ _ _ _
了解實作的目標後,先定義個容量已滿的方法暖暖身:
#![allow(unused)]
fn main() {
    fn is_full(&self) -> bool {
        self.cap() - self.len() == 1
    }
}
然後是 try_grow 的實作:
#![allow(unused)]
fn main() {
    fn try_grow(&mut self) {
        if self.is_full() {
            let old_cap = self.cap(); // 1
            self.ring_buf.try_grow(); // 2

            // 3
            if self.tail > self.head {
                // The content of ring buffer won't overlapped, so it's safe to
                // call `copy_nonoverlapping`. It's also safe to advance the
                // pointer by `old_cap` since the buffer has been doubled.
                unsafe {
                    let src = self.ptr(); // 4-1
                    let dst = self.ptr().add(old_cap); // 4-2
                    ptr::copy_nonoverlapping(src, dst, self.head);
                }
                self.head += old_cap; // 5
            }
        }
    }
}
- 將舊的容量存起來,因為當
ring_buf容量翻倍後,cap()返回的容量就會翻倍。 - 呼叫
RawVec::try_grow()讓容量翻倍。 - 在
tail大於head時,代表環在翻倍後會不連續,所以需要複製元素。 - 這裡用
ptr::copy_nonoverlapping進行位元複製,此函式語義上與 C 的memcpy相同。- 取得緩衝區首個索引的位址,作為複製的起始位址。
- 取擴增後部分的首個索引位址,作為複製的目標位址。
- 實際呼叫
memcpy,因為 head 永遠比最後一個元素索引多 1,剛好可作為元素數目。
- 被複製的元素位移了
old_cap,因此更新head映射到正確的head + old_cap。
我們完成了動態增加容量的方法的同時,也維持邏輯索引映射的正確性。
這裡維持索引正確性有稍微簡化,更高效優美的解法請參考標準函式庫
VecDeque::handle_capacity_increase。
查看元素
查看首末兩段的元素非常簡單,不過由於涉及底層儲存空間的指標操作,所以需要寫 Unsafe Rust:
#![allow(unused)]
fn main() {
    pub fn front(&self) -> Option<&T> {
        if self.is_empty() {
            return None;
        }
        // This is safe because the offset is wrapped inside valid memory region.
        unsafe { Some(&*self.ptr().add(self.tail)) }
    }

    pub fn back(&self) -> Option<&T> {
        if self.is_empty() {
            return None;
        }
        let head = self.wrapping_sub(self.head, 1);
        // This is safe because the offset is wrapped inside valid memory region.
        unsafe { Some(&*self.ptr().add(head)) }
    }
}
兩個函式都先判斷雙端佇列是否為空,再做指標位移運算,head - 1 是 back 的指標位移量,而 front 就直接回傳 tail 指向的值。其中 &* 是常見的 Rust 模式,可視為將裸指標「升級」為更安全的引用型別,步驟如下:
- 解引用裸指標,得到底下的裸數值。
- 建立一個安全的引用,指向裸數值。
這裡再來品嚐 is_empty 和 len 的實作:
#![allow(unused)]
fn main() {
    pub fn is_empty(&self) -> bool {
        self.len() == 0
    }

    pub fn len(&self) -> usize {
        self.head.wrapping_sub(self.tail) & (self.cap() - 1)
    }
}
len 用了環繞算術運算,讓 head - tail 能正確算出兩者的距離,並在用前面提及的「容量 - 1」的 $2^n - 1$ 做位元 AND 運算來捨棄高位。
增刪元素
來看從頭尾刪除元素的 pop_front 和 pop_back:
#![allow(unused)]
fn main() {
    pub fn pop_front(&mut self) -> Option<T> {
        if self.is_empty() {
            return None; // 1
        }

        let tail = self.tail;
        self.tail = self.wrapping_add(self.tail, 1); // 2

        // This is safe because the offset is wrapped inside valid memory region.
        unsafe { Some(self.ptr().add(tail).read()) } // 3
    }

    pub fn pop_back(&mut self) -> Option<T> {
        if self.is_empty() {
            return None; // 1
        }

        self.head = self.wrapping_sub(self.head, 1); // 2

        // This is safe because the offset is wrapped inside valid memory region.
        unsafe { Some(self.ptr().add(self.head).read()) } // 3
    }
}
- 同樣先判斷雙端佇列是否為空。
- 再來移動到下一個合法的索引上,會是 head - 1 或 tail + 1。
- 最後是指標位移再讀取,注意,雖然
ptr::read會複製指標指向的值,但可視為所有權轉移到回傳值上了,這是因為倘若原始src指向的資料帶有其他指標,那麼繼續使用src就可能導致記憶體安全問題。
再來看增加元素的 push_front 與 push_back:
#![allow(unused)]
fn main() {
    pub fn push_front(&mut self, elem: T) {
        self.try_grow(); // 1
        self.tail = self.wrapping_sub(self.tail, 1); // 2

        // This is safe because the offset is wrapped inside valid memory region.
        unsafe { self.ptr().add(self.tail).write(elem) } // 3
    }

    pub fn push_back(&mut self, elem: T) {
        self.try_grow(); // 1
        let head = self.head;
        self.head = self.wrapping_add(self.head, 1); // 2

        // This is safe because the offset is wrapped inside valid memory region.
        unsafe { self.ptr().add(head).write(elem) } // 3
    }
}
- 同樣先判斷雙端佇列是否為空。
- 再來移動到下一個合法的索引上,會是 head + 1 或 tail - 1。
- 最後是指標位移再寫入,
ptr::write不會觸發讀取或是 drop 裸指標指向的值,但使用上仍然要確認存取該位址是否合法。
以上就是 Deque 基本操作方法,至此,剩下最後一步「正確釋放記憶體」,雙端佇列基本款就完成了。
特徵
Rust 提供許多特徵(Trait),實作特徵可以讓資料結構更方便,更符合 Rust 社群的寫作慣例。
Drop
這是 Deque 最重要的特徵之一,也是完成 Deque 基本款的最後一個必要功能。Drop 會用來釋放儲存在 Deque 裡面元素的資源。實作是將所有元素 pop_back 出來,所有權轉移到 drop 函式內,函式本體執行結束後,就會自動呼叫該元素型別的 drop 並釋放資源。
#![allow(unused)]
fn main() {
impl<T> Drop for Deque<T> {
    fn drop(&mut self) {
        while let Some(_) = self.pop_back() {}
    }
}
}
也許你會問「為什麼不在 Deque.ring_buf 的 RawVec 實作 Drop 來釋放其內容的資源?」主因是權責區分,RawVec 僅負責釋放它自行配置的堆疊記憶體,不清楚內容元素該如何釋放記憶體,例如內容可能是 Region-based memory management,一起釋放效率更高,元素各別 mem::drop 反而拖累效率。
事實上
Deque::drop也能更高效,std::colletions::VecDeque::drop就是直接 drop 兩個指向切片(slice)的指標,而非每個元素各自處理,雖然最後可能殊途同歸,視編譯器最佳化程度而定。
Iterator
身為容器型別,沒有疊代器簡直不能用,Rust 提供許多疊代器特徵供實作,其中 Iterator 特徵最為基礎且重要,實作 Iterator 特徵需求一個 next 方法,會不斷回傳下一個元素。任何實作 Iterator 特徵的型別,都可以放入 for 迴圈疊代。
而 Rust 常見的疊代器設計模式包含三個產生疊代器的方法:
iter():慣例上回傳會產生不可變引用&T的Iterator。iter_mut():慣例上回傳會產出可變引用&mut T的Iterator。into_iter():慣例上回傳吃掉所有權T的Iterator,通常直接實作IntoIterator特徵即可,我們在下一段介紹它。
實作 Iterator 需要新的結構體,以儲存疊代的內部狀態:
#![allow(unused)]
fn main() {
pub struct Iter<'a, T> {
    head: usize,
    tail: usize,
    ring_buf: &'a [T],
}

pub struct IterMut<'a, T> {
    head: usize,
    tail: usize,
    ring_buf: &'a mut [T],
}
}
Iter:由於定位Deque中有元素的合法記憶體區域需要head和tail,因此儲存該兩者,並且儲存底層的環形緩衝區的切片引用,方便存取元素。IterMut:同Iter,但改為儲存可變的切片引用。
來看看 Iter 如何實作疊代器:
#![allow(unused)]
fn main() {
impl<'a, T> Iterator for Iter<'a, T> {
    type Item = &'a T;

    fn next(&mut self) -> Option<Self::Item> {
        if self.tail == self.head {
            return None; // 1
        }
        let tail = self.tail; // 2
        self.tail = wrap_index(self.tail.wrapping_add(1), self.ring_buf.len()); // 3
        self.ring_buf.get(tail) // 4
    }
}
}
- 當 tail 等於 head 時,代表環形緩衝區為空,直接回傳
None。 - tail 是
Deque最前端,這裡先將當前的 tail 儲存起來。 - 再將 Iter 上的 tail 增加 1(不影響原始 Deque),下一次呼叫
next就會取得下一個元素。 - 利用第二步儲存的當前 tail,配合
slice::get直接回傳一個元素。
再來處理 IterMut::next,直觀上將 Iter::next 的 self.ring_buf.get(tail) 改成 get_mut 即可。
#![allow(unused)]
fn main() {
impl<'a, T> Iterator for IterMut<'a, T> {
    type Item = &'a mut T;

    fn next(&mut self) -> Option<Self::Item> {
        if self.tail == self.head {
            return None;
        }
        let tail = self.tail;
        self.tail = wrap_index(self.tail.wrapping_add(1), self.ring_buf.len());
        self.ring_buf.get_mut(tail) // Change to `get_mut`
    }
}
}
欸!居然編譯失敗了,到底為什麼呢?
error[E0495]: cannot infer an appropriate lifetime for autoref due to conflicting requirements
   --> src/collections/deque/mod.rs:353:23
    |
353 |         self.ring_buf.get_mut(tail)
    |                       ^^^^^^^
    |
note: first, the lifetime cannot outlive the anonymous lifetime #1 defined on the method body at 347:5...
   --> src/collections/deque/mod.rs:347:5
    |
347 |     fn next(&mut self) -> Option<&'a mut T> {
    |     ^^^^^^^^^^^^^^^^^^^^^^^^^^^^^^^^^^^^^^^
note: ...so that reference does not outlive borrowed content
   --> src/collections/deque/mod.rs:353:9
    |
353 |         self.ring_buf.get_mut(tail)
    |         ^^^^^^^^^^^^^
note: but, the lifetime must be valid for the lifetime `'a` as defined on the impl at 344:6...
   --> src/collections/deque/mod.rs:344:6
    |
344 | impl<'a, T> Iterator for IterMut<'a, T> {
    |      ^^
note: ...so that the expression is assignable
   --> src/collections/deque/mod.rs:353:9
    |
353 |         self.ring_buf.get_mut(tail)
    |         ^^^^^^^^^^^^^^^^^^^^^^^^^^^
    = note: expected `Option<&'a mut T>`
               found `Option<&mut T>`
這個編譯錯誤是因為匿名的 &mut self 和 Self::Item 兩者生命週期不匹配。以下把函式簽名的生命週期展開來看:
#![allow(unused)]
fn main() {
    fn next<'anonymous>(&'anonymous mut self) -> Option<&'a mut T> {
        // ...
        self.ring_buf // &'anonymous [T]
            .get_mut(tail) // Some(&'anonymous mut T)
    }
}
嗯,這不太對,我們知道 Rust 保證「就算 drop 了疊代器本身,產出的元素仍然合法」,產出的元素若為引用絕對不會是迷途引用,例如下面範例:
#![allow(unused)]
fn main() {
let a = iter.next().unwrap();
let b = iter.next().unwrap();
drop(iter);
use_both(a, b);
}
但編譯器只看型別是否正確,並無法檢查執行期間的 &mut self 內部 ring_buf 和 Self::Item 是否活得一樣久,且由於 Iterator::next 函式簽名上沒有對 &mut self 的生命週期做任何限制,因此無法寫出下列這種預期中的生命週期限制(可視為要求 'b 至少活得跟 'a 一樣長):
#![allow(unused)]
fn main() {
impl<'a, T> Iterator for IterMut<'a, T> {
    type Item = &'a mut T;

    fn next<'b: 'a>(&'b mut self) -> Option<Self::Item> {
        // ...omit
    }
}

// error[E0195]: lifetime parameters or bounds on method `next` do not match the trait declaration
//    --> src/collections/deque/mod.rs:347:12
//     |
// 347 |     fn next<'b: 'a>(&'b mut self) -> Option<Self::Item> {
//     |            ^^^^^^^^ lifetimes do not match method in trait
}
當然,我們知道回傳 ring_buf 的 &'a mut T 在生命週期上合法,但編譯器認不出來,所以 unsafe 又要來拯救世界。
#![allow(unused)]
fn main() {
impl<'a, T> Iterator for IterMut<'a, T> {
    type Item = &'a mut T;

    fn next(&mut self) -> Option<Self::Item> {
        if self.tail == self.head {
            return None;
        }
        let tail = self.tail;
        self.tail = wrap_index(self.tail.wrapping_add(1), self.ring_buf.len());
        // This unsafe block is needed for solving the limitation of Iterator
        // trait: the `&mut self` is bound to an anonymous lifetime which rustc
        // cannot figure out whether it would outlive returning element. Hence
        // the explicit pointer casting is required.
        unsafe {
            let ptr = self.ring_buf as *mut [T]; // 1
            let slice = &mut *ptr; // 2
            slice.get_mut(tail) // 3
        }
    }
}
}
- 將
ring_buf轉換成裸指標,因為裸指標無生命週期,所以&mut self給的限制不見了。 - 再把
ptr指向的*mut [T]裸指標轉換成有生命週期的可變引用&mut [T]的切片。藉由 Rust 對回傳型別的自動推斷,此切片的實際型別會是&'a mut [T]。Got it!這就是我們所要的。 - 老老實實地呼叫
slice::get_mut,完全正確。
這類 An iterator yields borrowing contents from it
self的問題,有個俗名叫做 streaming iterator,可以透過泛型關聯型別(generic associated type a.k.a GAT)解決,但目前 GAT 尚未穩定。詳情可參考這篇介紹 GAT 與 streaming iterator workaroud 的文章。
欸,或許你有疑惑,
Iter::next不也同樣有生命週期問題嗎,為什麼沒有報錯呢?這是因為所有&T引用都預設實作 Copy 特徵,呼叫slice::get()時會自動複製ring_buf的引用,因此沒有生命週期的問題,但&mut T並沒有實作 Copy 特徵,才會遇上生命週期不符的編譯錯誤。
IntoIterator
相較於 Interator,IntoIterator 是一個讓容器型別錦上添花的特徵,主要功能是:將一個型別自動轉換為有實作 Iterator 的型別,實作後該型別就可以直接放入 for 迴圈中。
例如下列用法:
#![allow(unused)]
fn main() {
let mut d = Deque::new();
d.push_back(1);
d.push_back(2);
d.push_front(3);
d.push_front(4);

for elem in &d {
    println!("{:?}". elem);
}

for elem in &mut d {
    *elem *= *elem;
}
}
實作上分三個:
impl<T> IntoIterator for Deque<T>:將容器轉換成疊代器,並轉移容器和元素的所有權。impl<'a, T> IntoIterator for &'a Deque<T>:將容器不可變引用轉換成不可變元素的疊代器。impl<'a, T> IntoIterator for &'a mut Deque<T>:將容器可變引用轉換成可變元素的疊代器。
先說明後面兩者。以下實作非常簡單,只要根據容器引用可變與否,對應呼叫前一段提及的 Deque::iter 或 Deque::iter_mut 即可,這算是 Rust 容器型別的一貫作法。
#![allow(unused)]
fn main() {
impl<'a, T> IntoIterator for &'a Deque<T> {
    type Item = &'a T;
    type IntoIter = Iter<'a, T>;

    fn into_iter(self) -> Self::IntoIter {
        self.iter()
    }
}

impl<'a, T> IntoIterator for &'a mut Deque<T> {
    type Item = &'a mut T;
    type IntoIter = IterMut<'a, T>;

    fn into_iter(self) -> Self::IntoIter {
        self.iter_mut()
    }
}
}
至於 impl<T> IntoIterator for Deque<T> 和 iter 與 iter_mut 不一樣,會吃所有權,所以需要宣告額外的結構體來儲存其內部狀態,並直接實作 IntoIterator 要求的 into_iter 方法:
#![allow(unused)]
fn main() {
pub struct IntoIter<T>(Deque<T>);

impl<T> IntoIterator for Deque<T> {
    type Item = T;
    type IntoIter = IntoIter<T>;

    fn into_iter(self) -> Self::IntoIter {
        IntoIter(self)
    }
}
}
此疊代方法中,佇列內元素的所有權會轉移,所以不需要跟 Iter 一樣保存切片,可以直接存整個 Deque 作為內部狀態,拿走 Deque 的所有權。
既然掌控 Deque 所有權,實作疊代器就沒有困難了,直接將所有元素 pop 取出即可。
#![allow(unused)]
fn main() {
impl<T> Iterator for IntoIter<T> {
    type Item = T;

    fn next(&mut self) -> Option<Self::Item> {
        self.0.pop_front()
    }
}
}
Index and IndexMut
用索引下標 array[index] 取值的語法常見於各大主流語言,Rust 提供 Index 和 IndexMut 兩個特徵來實作這個運算子,讓容器型別更符合人體工學。
實作方法是利用邏輯索引映射 段落實作的 wrap_index 得出實際索引,再透過指標取值即可。唯一需要注意的是越界存取(out of bound access)可能產生未定義行為,不符合 Rust 對記憶體安全的要求,所以在裸指標存取之前,就要直接 assert! 索引是否在元素數量的安全範圍內,防止越界存取。
#![allow(unused)]
fn main() {
impl<T> Index<usize> for Deque<T> {
    type Output = T;

    fn index(&self, index: usize) -> &Self::Output {
        assert!(index < self.len(), "Out of bound");
        let index = self.wrapping_add(self.tail, index);
        // This is safe because the offset is wrapped inside valid memory region.
        unsafe { &*self.ptr().add(index) }
    }
}

impl<T> IndexMut<usize> for Deque<T> {
    fn index_mut(&mut self, index: usize) -> &mut T {
        assert!(index < self.len(), "Out of bound");
        let index = self.wrapping_add(self.tail, index);
        // This is safe because the offset is wrapped inside valid memory region.
        unsafe { &mut *self.ptr().add(index) }
    }
}
}
Debug
最後,介紹一下 fmt::Formatter 有許多方便的 debug 格式化輸出的方法,例如 debug_list 可以丟一個疊代器,會轉化成序列般的輸出格式。
#![allow(unused)]
fn main() {
impl<T: fmt::Debug> fmt::Debug for Deque<T> {
    fn fmt(&self, f: &mut fmt::Formatter) -> fmt::Result {
        f.debug_list().entries(self.iter()).finish()
    }
}
}
當然,如果想要對 RawVec 實作 Debug 特徵,免手寫,可直接用 derive 屬性讓編譯器推導實作。
#![allow(unused)]
fn main() {
#[derive(Debug)] // Add this line to derive Debug trait automatically.
struct RawVec<T> {
    ptr: *mut T,
    cap: usize,
}
}
效能
以環形緩衝區為底層儲存容器的雙端序列,各操作複雜度如下:
| Operation | Best case | Worst case |
|---|---|---|
| push_front(v) | $O(1)$ | $O(1)$~ |
| push_back(v) | $O(1)$ | $O(1)$~ |
| pop_front(v) | $O(1)$ | $O(1)$~ |
| pop_back(v) | $O(1)$ | $O(1)$~ |
| front | $O(1)$ | $O(1)$ |
| back | $O(1)$ | $O(1)$ |
| len | $O(1)$ | $O(1)$ |
$n$:資料筆數。
$v$:資料值。
~:平攤後的複雜度(amortized)。
雙端佇列任何操作都是直接對 head 或 tail 的索引讀寫記憶體,複雜度皆為 $O(1)$,不過因為增減元素需要動態調整儲存空間大小,所以這些方法的時間複雜度需要平攤。
空間複雜度則是只用了一個環形緩衝區儲存元素,和幾個欄位儲存 tail、head 還有容量,因此額外空間複雜度只有 $O(1)$。
參考資料
- Rust Documentation:
VecDeque - Rust
RawVecImplementation - Wiki: Circular buffer
- Circular Buffer Image by Cburnett CC BY-SA-3.0 via Wikimedia Commons.